Archive

Window Glazing

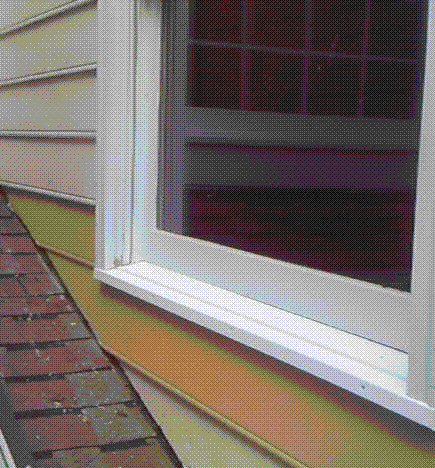
So factory replacement sashes are adrift in a blizzard of bureaucratic paperwork and the damaged sash on the house is literally melting into mush minute by minute in plain sight.

What to do? Board up the window for an interminable interim? Or find a tricky way to stabilize the damaged section? Choice the second was not that difficult. Ordinary stock off-the -shelf moulding ripped down to size and overlayed on solid sash pieces protected and stabilized the damaged part.

The channel formed by the overlay was filled with old timey glazing compound for an attractive and robust repair.

When the replacement sash finally arrives the damaged sash can be removed in one piece and the new sash dropped into place.

A unique and inexpensive solution for a somewhat intractable problem!

StopMoulding2

In a previous episode I presented pictures of the basic steps required to install replacement vinyl windows. CLICK LINK HERE

Today, a brief video to demystify the somewhat obscure process required to remove stop moulding from the interior jamb.

The classic window jamb covered with a finish coat of interior paint can confuse many homeowners into a belief the wood trim is all one monolithic piece of moulding.

In fact, a replacement vinyl window installation may be no more complicated than the careful separation of a very thin narrow strip of stop moulding at the hidden seam disguised with caulk and paint.

With three tools- -a razor knife, flexible blade putty knife and rigid flat bar –combined with patience it is possible to remove this thin strip of jamb stop and reuse it to complete the new window installation.

Step #1 Remove Interior Casing

Step #1 Remove Interior Casing

Step #2 Remove existing sash and liner

Step #2 Remove existing sash and liner

Step #3 Unwrap and insert new sash and liner

Step #3 Unwrap and insert new sash and liner

Step #4 Screw new liner to frame

Step #4 Screw new liner to frame

Reattach trim casing

Reattach trim casing

Vinyl Replacement Windows- the 21st Century solution to the endless maintenance
of the putty glazed 12 lite wood sash of yesteryear.

Easy to clean from inside,just tilt the sash down for quick access to the outside glass.

Easy to repair, just remove the entire sash by releasing two upper and lower pins.

Easy on the utility bills, the furnace and Air Conditioner run less and cool more with
double insulated glass.

No paint, no putty, no hard-to-open, hard-to-close operation in humid weather.

Definitely an innovation for any homeowner to consider.

Metal sash basement windows! They survive everywhere!

Rarely assaulted by children’s baseballs or random vandalism and firmly mortared into the brick facade as part of the original construction they quietly rust into oblivion.

Read More

Fans of the Curiosity Bin (LINK HERE) might be intrigued by my latest adventure – an
opportunity to examine a crate of an early (Think Generation 1.0) example of
evacuated glass.

A form of insulated glass, evacuated glass consists of two layers of glass molded
together with an air space separating them from each other. Imagine a glass bottle
flattened into a window pane.

Unlike the Thermopane style insulated glass there is no spacer bar and each pane
is completely sealed and remarkably thin. These examples made some thirty odd
years ago were thicker than laminated glass but thinner than the current insulated
panes common to the vinyl insulated window industry.

It is difficult for photographs to do justice to this remarkable cache from the
past, but I tried.

I have no idea who made them or the R value of one pane.

Here are some educational links I found on line:

CLICK HERE

CLICK HERE

A visit to a glazing job from yesteryear……

Aging gracefully after three years…. here is a closeup view of a small window glazing job from 2009.

All the putty was removed from all the window panes in three oversize front facade windows and re-puttied and primed and painted.

Protected by vintage vinyl storm windows these windows remain remarkably clean and free from dirt, mold and insect detritus after three years of hot summers, wet winters and dusty autumn winds.

While the cutlines are all crisp, notice there is, in fact, a continuous paint seal attached to the glass to protect the putty and keep the oil from premature drying and aging.

All things equal, this glazing job should last another 10 to 20 years, especially if properly painted on a regular maintenance cycle.

This is a picture of a premium wood sash with true wood muntins and individual 12×12 insulated glass panes.

Known generically as a “true divided lite insulated glass window”. The glass is held in place with wood glazing sticks. (NO putty!!)

With proper maintenance these windows with their all wood construction should easily have a service life of 100+ years.

But the devil is in the details.

As it happens insulated glass panes have a relatively short service life before the seal between the insulated panes is compromised and moisture accumulates and randomly fogs the window. In some cases less than 20 years.

It is an exercise in futility to replace one 20 year insulated glass pane with another 20 year insulated glass pane in a long life sash so the owner opted to use single sheet 3/8 inch plate glass to exactly fill the space formerly occupied by the insulated glass pane.

As an added bonus the plate glass replacement is cheaper than the insulated pane counterpart.